Introduction to the plugin system for developers.
Plugin SDK — Overview
This section is for developers. If you're not a programmer, you can skip this — everything in the previous sections works without writing any code.
The plugin system lets developers extend ED5 with custom game mechanics, chat commands, server events, HUD widgets, and client-side features. There are two types:
- Server plugins — run on the game server with access to all game systems
- Client plugins — run in the player's browser with HUD widget and chat APIs
Where Plugins Live
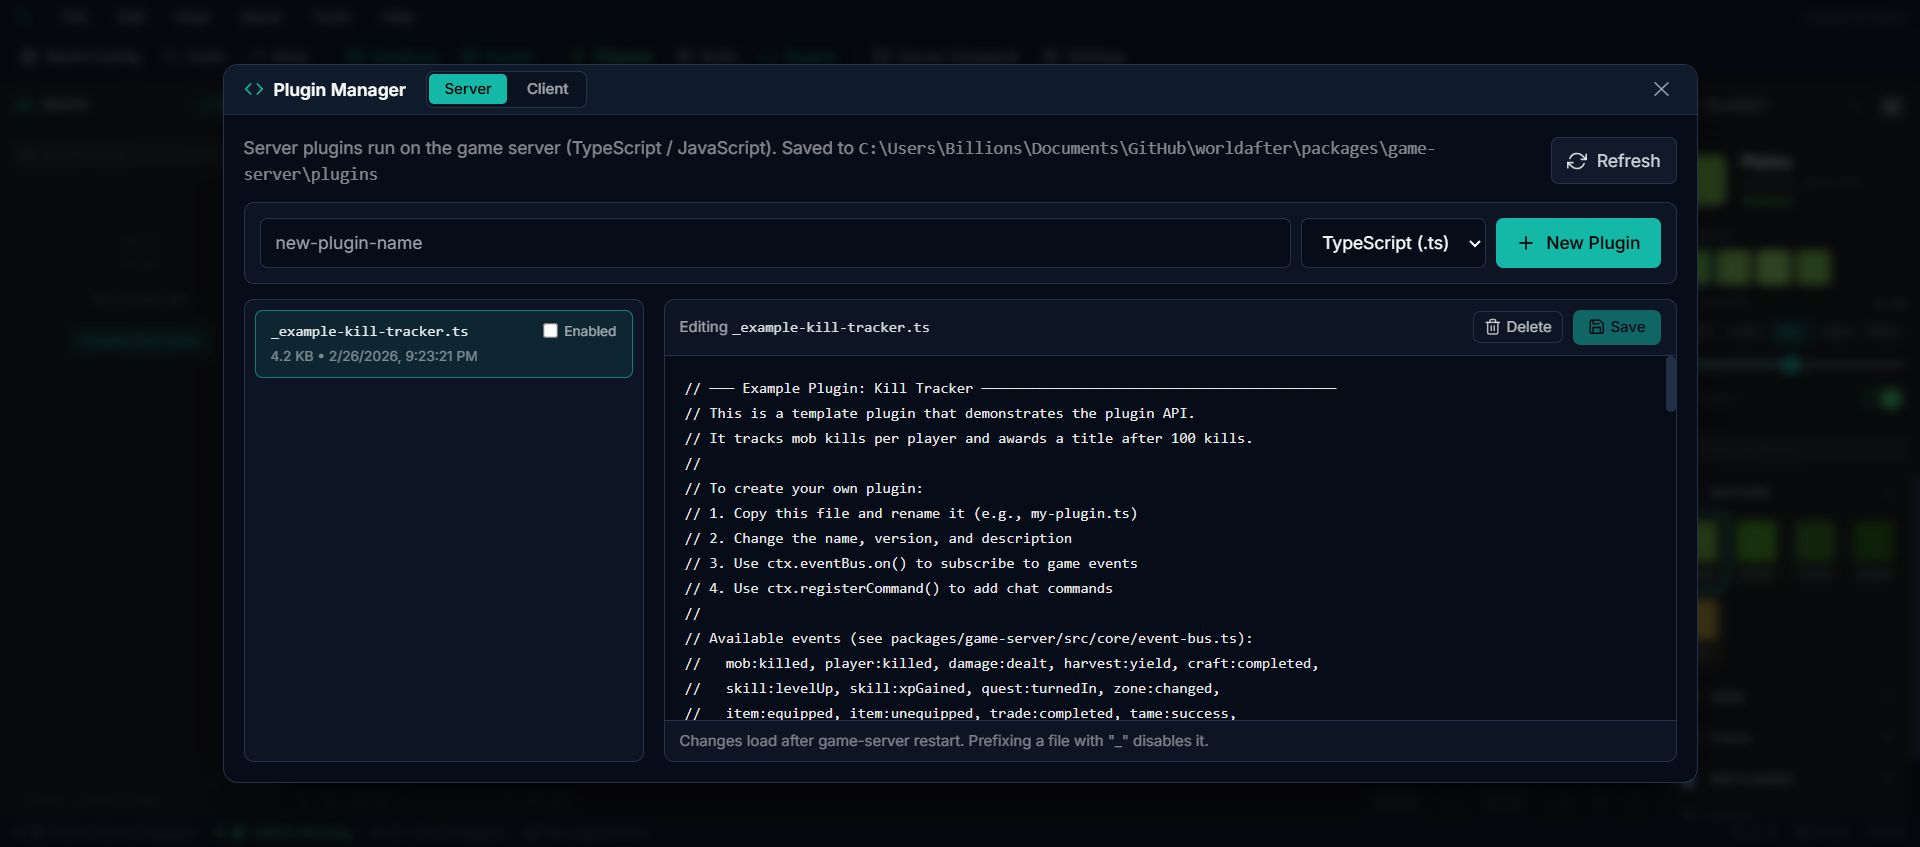
The Studio app manages plugins through the Plugins editor in the sidebar:
| Type | Location | Extension |
|---|---|---|
| Server plugins | plugins/ folder inside the Studio data directory | .ts |
| Client plugins | client-plugins/ folder inside the Studio data directory | .js |
Auto-Loading
Plugins load automatically when the server starts. Just create a file (or use the built-in editor) and restart.
Naming Rules
| Pattern | Behavior |
|---|---|
my-plugin.ts | Server plugin — loaded automatically |
my-widget.js | Client plugin — sent to all connected players |
_disabled-plugin.ts | Skipped (underscore prefix disables) |
Your First Server Plugin
Create a new server plugin in the Plugin editor (or as a .ts file):
import type { PluginDefinition } from "../src/core/plugin-system.js";
const plugin: PluginDefinition = {
  name: "welcome",
  version: "1.0.0",
  description: "Welcomes players on login",
register(ctx) {
    ctx.log.info("Welcome plugin loaded!");
ctx.eventBus.on("player:login", (e) => {
      ctx.sendSystemMessage(e.playerId, "Welcome to the server!");
    });
ctx.registerCommand("hello", (entityId, args) => {
      const name = args[0] ?? "adventurer";
      ctx.sendSystemMessage(entityId, Hello, ${name}!);
    }, {
      description: "Greet someone",
      usage: "/hello [name]",
    });
  },
};
export default plugin;
Your First Client Plugin
Create a new client plugin in the Plugin editor (or as a .js file):
ctx.log.info("Stats HUD loaded!");
var widgetId = ctx.createWidget({
  html: buildHtml(ctx.getState()),
  anchor: "top-right",
  position: { x: 16, y: 80 },
  width: 180,
  draggable: true,
  css: "background:rgba(0,0,0,0.75);" +
       "color:#eee;border:1px solid #555;" +
       "border-radius:8px;padding:10px;" +
       "font-family:monospace;font-size:12px;",
});
ctx.onStateChange(function() {
  ctx.updateWidget(widgetId, {
    html: buildHtml(ctx.getState()),
  });
});
function buildHtml(state) {
  return "<div>" +
    "HP: " + state.selfHp + "/" + state.selfMaxHp +
    "<br>MP: " + state.selfMp + "/" + state.selfMaxMp +
    "<br>Gold: " + state.selfSilver +
    "</div>";
}
Plugin Structure
Every server plugin exports a PluginDefinition object:
interface PluginDefinition {
  name: string;          // Unique identifier
  version: string;       // e.g., "1.0.0"
  author?: string;
  description?: string;
register(ctx: PluginContext): void | Promise<void>;
  unregister?(): void | Promise<void>;
}
The register function receives a PluginContext — this is the full API for interacting with the game server.
Auto-Cleanup
All subscriptions, commands, timers, and channels registered through ctx are automatically cleaned up when:
- The server shuts down
- The plugin is disabled or reloaded
unregister() hook is optional and only needed for external resources.