Download, install, and launch ED5 MMO Studio.
Installation & Setup
Getting started takes just a few minutes.
Download
Download the ED5 MMO Studio installer for your platform from the official website or your purchase portal:
- Windows —
.exeinstaller - macOS —
.dmgdisk image - Linux —
.AppImage
Install
Run the installer and follow the on-screen prompts. The Studio installs like any other desktop application — no extra tools or dependencies required.
First Launch
When you open the Studio for the first time:
1. The editor loads with a sidebar showing all content categories 2. A default database is created automatically — this stores all your game data locally 3. You're ready to start building — no configuration needed
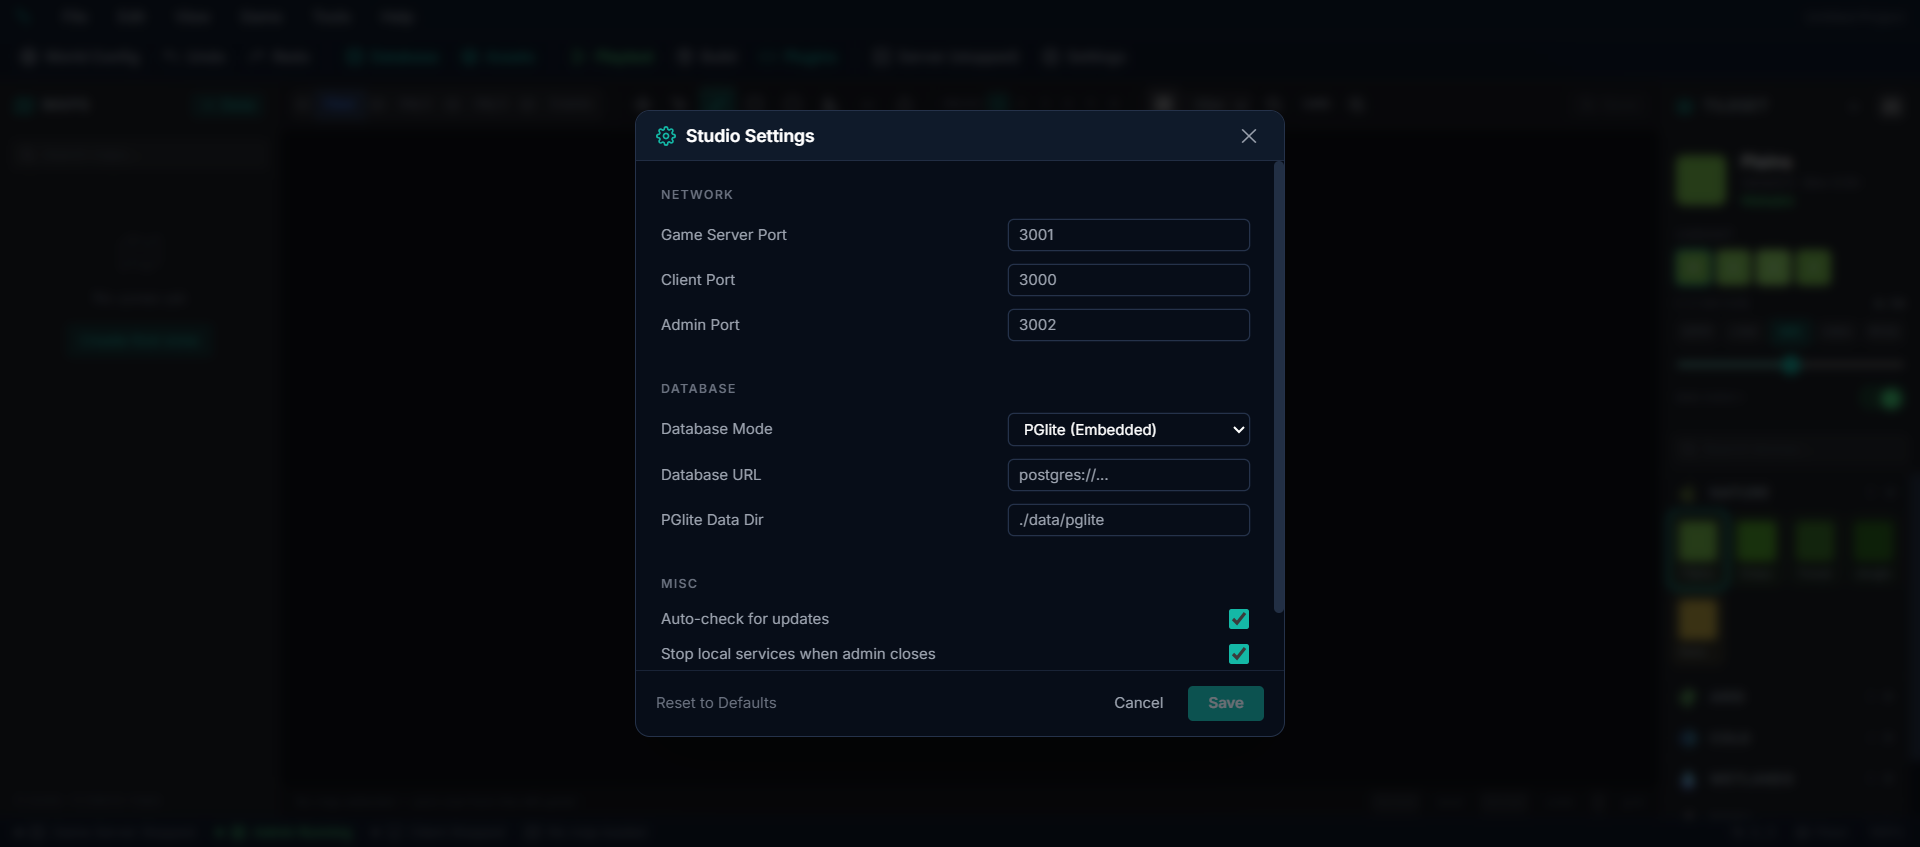
Settings
Open Settings from the sidebar to configure:
| Setting | Description |
|---|---|
| Database Mode | Local (default, no setup needed), Docker, or Remote PostgreSQL |
| Server Port | Which port the game server listens on (default: 3001) |
| Client Port | Which port players connect to (default: 3000) |
| Auto-Update | Check for Studio updates on startup |
| Auto-Save | How frequently the map editor saves your work |
For most users, the default settings work perfectly.
Quick Test
1. Click Zones in the sidebar and create a new zone 2. Paint some terrain with the brush tools 3. Click the Play button in the toolbar to launch the game client 4. You should see your character standing in the zone you just created!
Next: Quick Start Tutorial — build your first zone and add content.